Easter Poke Cake
Easter Poke Cake – A Colorful and Delicious Easter Dessert
Table of Contents
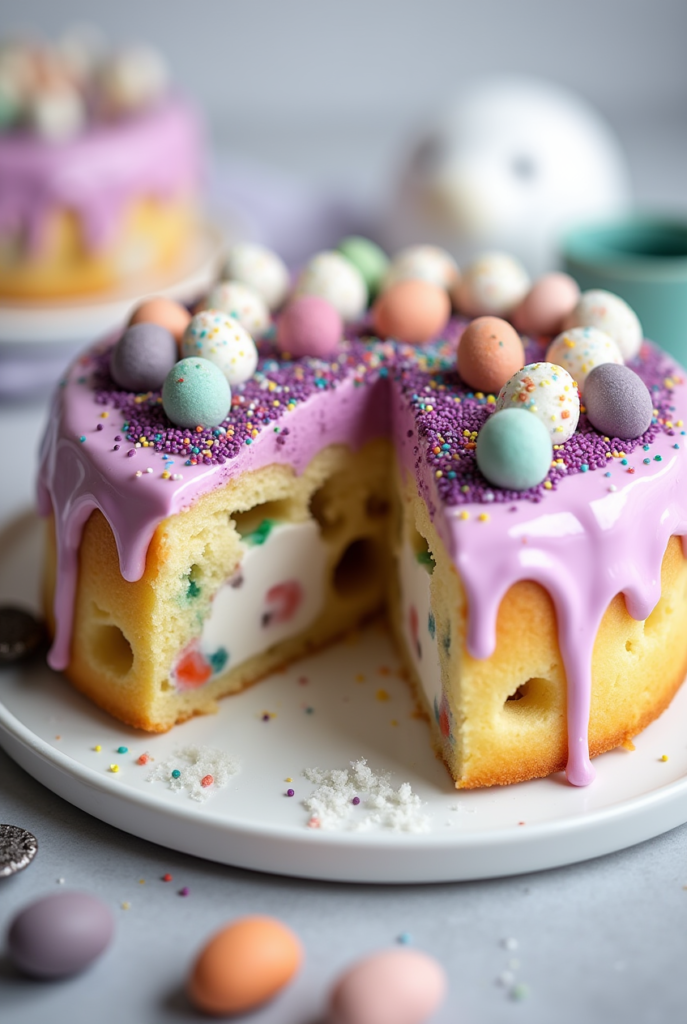
If you’re looking for a fun, festive, and delicious dessert to celebrate Easter, then an Easter Poke Cake is the perfect choice. This colorful and creamy dessert is not only easy to make but also a showstopper at any springtime gathering. The cake is baked, poked with holes, and filled with vibrant layers of jello that create a visually stunning effect. Topped with fluffy whipped cream and sprinkles, it’s a delicious treat everyone will love.
In this article, you’ll learn everything you need to know about making an Easter Poke Cake, including the key ingredients and their roles, preparation time, ingredients, step-by-step cooking instructions, expert tips, presentation ideas, creative twists, pro tips for customization, and frequently asked questions (FAQs). Let’s dive in!
Key Ingredients and Their Roles
Understanding the role each ingredient plays in an Easter Poke Cake helps you achieve the perfect texture and flavor. Here are the key ingredients and their functions:
1. Boxed Cake Mix (or Homemade Cake)
The base of your poke cake is the cake itself. While you can make a homemade cake, a boxed cake mix makes this dessert quick and easy to prepare.
- Role: Provides structure and a soft, moist base for the poke cake.
- Tip: Choose a white or yellow cake mix for a light and airy result.
2. Eggs
Eggs are crucial in binding the ingredients together and helping the cake rise.
- Role: Adds structure and moisture.
- Tip: Use room-temperature eggs for a smoother batter and even mixing.
3. Vegetable Oil
Vegetable oil adds moisture to the cake, ensuring that it remains soft and fluffy.
- Role: Contributes to the cake’s texture, making it moist.
- Tip: You can also use other neutral oils like canola oil for the same effect.
4. Water
Water helps thin the batter and ensures even mixing of the dry and wet ingredients.
- Role: Hydrates the cake mix and helps with consistency.
- Tip: Follow the cake mix instructions for the correct amount of water.
5. Gelatin (Jello)
The fun part of the poke cake is the colorful jello that seeps into the holes of the cake. The jello not only provides vibrant color but also adds a sweet, fruity flavor.
- Role: Adds color, flavor, and moisture to the cake.
- Tip: Use different flavors of jello to create a rainbow effect.
6. Whipped Topping (or Whipped Cream)
Topping your Easter Poke Cake with whipped cream adds lightness and a creamy texture. It balances the sweetness of the jello and cake.
- Role: Provides a creamy, light texture that contrasts with the dense cake and jello.
- Tip: Use fresh whipped cream or a store-bought whipped topping for convenience.
7. Sprinkles and Easter Candy
For a festive Easter touch, add colorful sprinkles and small Easter candies on top of the whipped cream.
- Role: Enhances the presentation and adds extra sweetness.
- Tip: Choose pastel-colored sprinkles or Easter-themed candy for a holiday vibe.
Preparation Time
- Prep Time: 15 minutes
- Cook Time: 30-35 minutes
- Cooling Time: 1 hour
- Total Time: About 2 hours
The Easter Poke Cake takes a little time to bake, but most of the work is hands-off while the cake cools and the jello sets. This dessert can be made ahead of time, making it a perfect option for Easter celebrations.
Ingredients
Here’s a list of all the ingredients you’ll need to make the Easter Poke Cake:
- 1 box white or yellow cake mix (or your homemade cake recipe)
- 3 large eggs
- ½ cup vegetable oil
- 1 cup water
- 1 box (3 oz) Jello in various colors (strawberry, lime, and lemon for Easter colors)
- 1 cup whipped topping or whipped cream
- Easter sprinkles or pastel-colored candies (optional)
Step-by-Step Cooking Instructions
Follow these simple steps to make the perfect Easter Poke Cake:
Step 1: Prepare the Cake
Preheat your oven to the temperature specified on the cake mix box (typically 350°F or 175°C). Grease and flour a 9×13-inch baking pan or line it with parchment paper.
In a large mixing bowl, combine the cake mix, eggs, vegetable oil, and water. Mix everything together until smooth.
- Expert Tip: Use an electric mixer for faster and more even mixing.
Pour the cake batter into the prepared pan and spread it out evenly. Bake according to the instructions on the cake mix box, typically 30-35 minutes, or until a toothpick inserted into the center comes out clean.
- Expert Tip: Do not overbake. Check the cake a few minutes before the timer goes off to ensure it stays moist.
Step 2: Cool the Cake
Once the cake is done baking, remove it from the oven and let it cool in the pan for about 10 minutes. After 10 minutes, transfer it to a wire rack to cool completely (about 1 hour).
- Expert Tip: Allowing the cake to cool completely is crucial before adding the jello so it doesn’t melt.
Step 3: Poke Holes in the Cake
Once the cake is completely cooled, use a fork or the handle of a wooden spoon to poke holes all over the cake. Be sure to make the holes deep but not all the way to the bottom of the pan.
- Expert Tip: The more holes you create, the more jello will seep into the cake, giving it extra flavor and color.
Step 4: Prepare the Jello
While the cake is cooling, prepare the jello. In separate bowls, mix each box of Jello with 1 cup of boiling water, stirring until the gelatin is completely dissolved. Let the jello cool for a few minutes.
- Expert Tip: To create a layered effect, use different colors of jello and pour each color into separate bowls.
Step 5: Add the Jello
Carefully pour the jello into the holes of the cake. You can use a spoon or pour the jello from a measuring cup with a spout. Let the jello settle into the holes for about 5-10 minutes.
- Expert Tip: Pour the jello slowly to prevent it from spilling over the sides of the cake.
Step 6: Refrigerate
Once the jello has been added, cover the cake with plastic wrap or foil and refrigerate it for at least 3-4 hours, or overnight for best results.
- Expert Tip: The longer the cake sits, the more the flavors will meld together.
Step 7: Add the Whipped Topping
After the cake has set and the jello has absorbed, spread a layer of whipped topping or whipped cream evenly over the entire cake.
- Expert Tip: Use an offset spatula for smooth, even coverage.
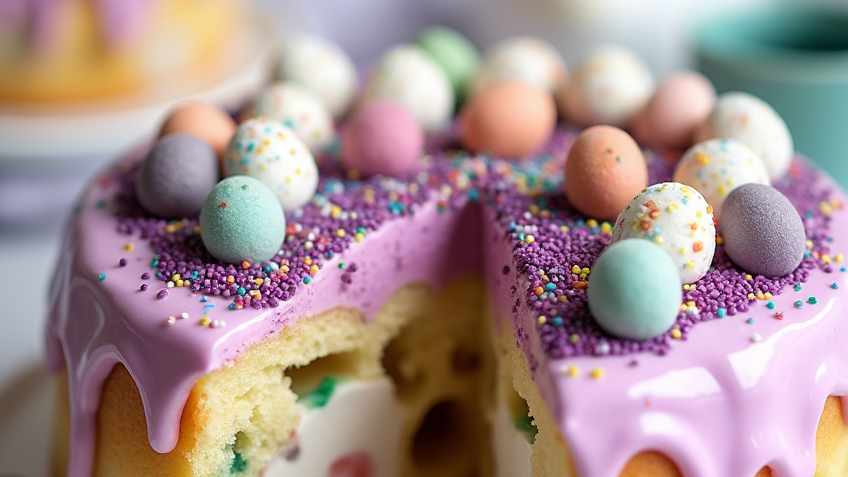
Step 8: Decorate
Finish decorating the cake with colorful sprinkles and pastel Easter candy.
- Expert Tip: For a more festive look, consider adding small chocolate Easter eggs, marshmallow bunnies, or jelly beans.
Presentation Tips
To make your Easter Poke Cake even more festive, consider these presentation ideas:
- Cake Stand: Place the cake on a decorative cake stand for an elegant display.
- Easter-Themed Platter: Serve the cake on a platter with spring flowers for a whimsical touch.
- Layered Jello Effect: If you used different colored jello, the layers will be visible when you cut into the cake—this adds a beautiful, rainbow-like effect.
Creative Twists
Add your own unique spin to this classic Easter Poke Cake with these creative twists:
- Coconut Easter Poke Cake: Add shredded coconut to the whipped topping for a tropical flavor.
- Chocolate Poke Cake: Use chocolate cake mix instead of white or yellow for a richer flavor.
- Berries: Add fresh berries like strawberries or blueberries between the layers of whipped cream for a fruity twist.
- Lemon Flavor: Add a bit of lemon zest to the whipped topping for a fresh, zesty kick.
Pro Tip for Customization
Want to customize your Easter Poke Cake even further? You can use different flavors of Jello to match your theme. For a more sophisticated version, replace the whipped topping with a cream cheese frosting or a tangy lemon curd for a slightly tart contrast to the sweet cake.
Frequently Asked Questions (FAQs)
1. Can I make the Easter Poke Cake a day ahead?
Yes, this cake actually gets better as it sits. Make it a day ahead to give the jello time to fully set and the flavors to develop.
2. Can I use homemade cake instead of a boxed mix?
Absolutely! You can use any homemade cake recipe. Just be sure it’s a flavor that pairs well with Jello, like vanilla or yellow cake.
3. Can I use sugar-free Jello?
Yes, you can use sugar-free Jello for a lower-calorie version of this cake.
4. How long can I store the Easter Poke Cake?
Store any leftovers in an airtight container in the refrigerator for up to 4-5 days.
5. Can I freeze the Easter Poke Cake?
While the cake can be frozen, the texture of the whipped topping and jello may change
after freezing and thawing. It’s best enjoyed fresh.
With its colorful layers, sweet jello filling, and creamy topping, Easter Poke Cake is the perfect dessert for your Easter celebrations. Follow this easy recipe, and you’ll have a beautiful and delicious treat that will impress your guests and bring a burst of springtime joy to your table!
If you like it, Leave a Comment !
There are no reviews yet. Be the first one to write one.