Easter Chick Dipped Wafer Cookies
Easter Chick Dipped Wafer Cookies: A Festive Delight for Your Easter Celebration
Table of Contents
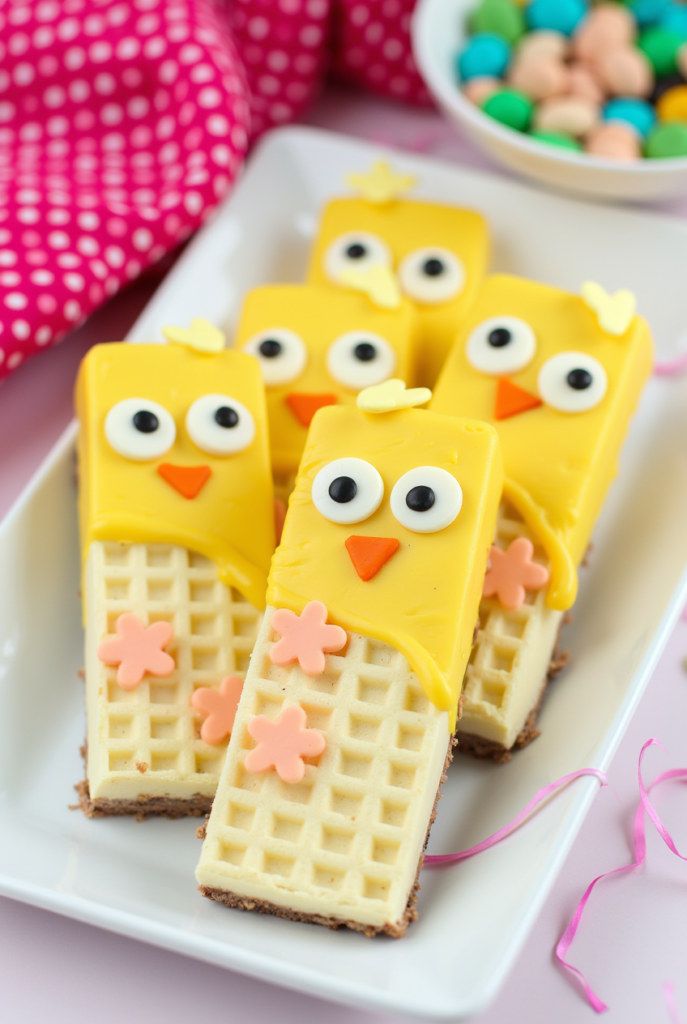
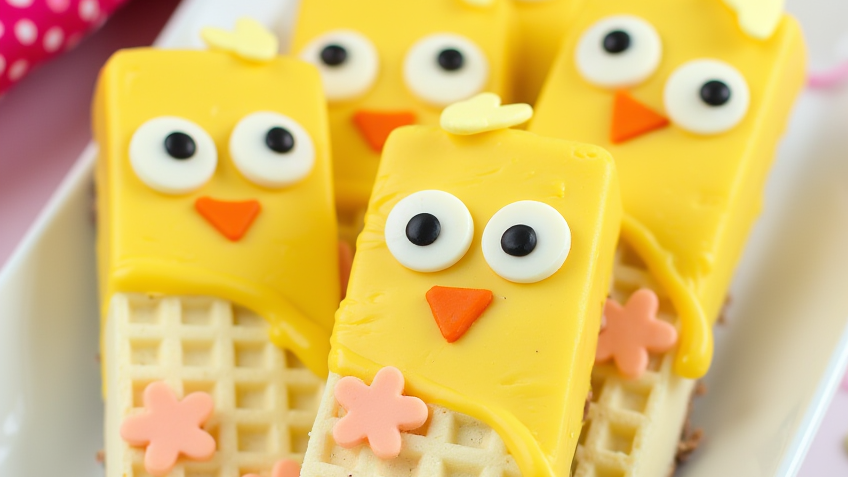
Easter is the perfect time to indulge in festive treats, and Easter Chick Dipped Wafer Cookies are an adorable, delicious, and easy-to-make dessert that will bring joy to any Easter celebration. These cookies feature crispy wafer layers coated in colorful chocolate and shaped like little chicks, making them a fun treat for kids and adults alike. Whether you’re preparing for an Easter party or looking for a sweet snack treat to share with family, these cookies are sure to impress.
In this article, we’ll dive into everything you need to know to create the perfect Easter Chick Dipped Wafer Cookies. From the key ingredients and their roles to step-by-step instructions, expert tips, and creative twists, this guide will ensure you make these cookies with ease. You’ll also find answers to some common questions to help perfect your baking skills.
Key Ingredients and Their Roles
Understanding the role of each ingredient in the Easter Chick Dipped Wafer Cookies is essential for achieving the right texture and flavor. Here’s a breakdown of the ingredients you’ll need:
For the Wafer Cookies
- Wafer Cookies – These are the base of the treat. The crispy texture of the wafer cookies provides a nice contrast to the chocolate coating. Vanilla or chocolate-flavored wafers work well.
- Powdered Sugar – Lightens the texture of the chocolate coating and adds a slight sweetness to balance the flavors.
- Butter – Provides richness and helps the chocolate coating adhere smoothly to the wafer cookies.
- Vanilla Extract – Enhances the flavor of the chocolate and adds a depth of sweetness.
For the Chocolate Coating
- White Chocolate Chips – Used for coating the wafer cookies and creating the base for the “chick” color. You can also use yellow candy melts for a brighter, more vibrant color.
- Yellow Food Coloring – Gives the white chocolate a cheerful yellow hue, turning your cookies into adorable chicks.
- Milk Chocolate Chips – These are used for creating the chick’s eyes and beak for contrast. You can also use dark chocolate chips for a more defined look.
For Decorating
- Candy Eyes – Small edible candy eyes are perfect for making your chick designs look cute and lifelike.
- Orange Candy (for beaks) – Orange candies, such as small pieces of orange licorice or candy melts, are perfect for creating the beak of the chick.
- Mini Sprinkles or Edible Glitter (optional) – These add a fun, festive touch for extra decoration.
Preparation Time
- Prep Time: 15 minutes
- Assembly Time: 30 minutes
- Chill Time: 15-30 minutes (if necessary)
- Total Time: 1 hour
Ingredients
For the Wafer Cookies
- 1 package of wafer cookies (preferably vanilla or chocolate-flavored)
- 1 tablespoon powdered sugar
- 1 tablespoon butter, melted
- 1 teaspoon vanilla extract
For the Chocolate Coating
- 1 cup white chocolate chips
- Yellow food coloring (liquid or gel)
- ½ cup milk chocolate chips
For Decorating
- Edible candy eyes
- Orange candy (for the chick’s beak)
- Optional: Mini sprinkles or edible glitter for extra decoration
Step-by-Step Cooking Instructions
Step 1: Prepare the Wafer Cookies
- Arrange the wafer cookies – Lay out the wafer cookies on a flat surface or tray, making sure they are all facing up and ready to be dipped.
- Mix the chocolate coating ingredients – In a microwave-safe bowl, melt the white chocolate chips in the microwave in 30-second intervals, stirring between each interval until smooth and fully melted.
- Add the color – Once the white chocolate is smooth, add a few drops of yellow food coloring to create the bright yellow hue for your Easter chick cookies. Stir until well incorporated.
Step 2: Dip the Wafer Cookies
- Dip the cookies – Hold each wafer cookie by one end and dip it into the yellow chocolate coating. Make sure to cover the cookie halfway or to your desired level.
- Set the cookies aside – Once dipped, place the wafer cookies on a parchment paper-lined tray to allow the chocolate to set. Repeat for all the cookies.
- Let the chocolate set – Allow the yellow chocolate coating to set for about 10-15 minutes at room temperature or place them in the fridge for quicker results.
Step 3: Decorate the Cookies
- Melt the milk chocolate – In a microwave-safe bowl, melt the milk chocolate chips in the microwave in 30-second intervals, stirring between each interval until smooth.
- Add the eyes – Once the yellow chocolate coating has set, use a small amount of the melted milk chocolate to place two candy eyes on each cookie to create the chick’s face.
- Create the beak – Cut small pieces of orange candy or use orange candy melts to create the chick’s beak. Attach them using a small dab of milk chocolate.
- Add sprinkles or glitter (optional) – For a little extra flair, sprinkle mini sprinkles or edible glitter on top of the cookies before the chocolate coating fully hardens.
Step 4: Final Setting and Serving
- Allow the cookies to set completely – Let the cookies cool completely and the chocolate harden for about 15-20 minutes before serving.
- Serve and enjoy – Once the chocolate is fully set, your Easter Chick Dipped Wafer Cookies are ready to be enjoyed by everyone at your Easter gathering!
Expert Tips for Perfect Easter Chick Dipped Wafer Cookies
- Use a steady hand when dipping – To ensure clean lines and a smooth coating, dip each wafer cookie slowly and steadily into the chocolate.
- Melt the chocolate in intervals – If you’re using a microwave, always melt chocolate in short intervals to prevent burning. Stir well between each interval.
- Work quickly with chocolate – Chocolate can set quickly, so try to work efficiently when adding decorations and eyes to avoid the chocolate hardening before you finish.
- Use parchment paper – Always place the dipped cookies on parchment paper to prevent sticking and make cleanup easier.
Presentation Tips
- Display on a festive tray – Arrange the cookies on a beautiful platter or tray with an Easter-themed cloth or decorative grass.
- Add extra decorations – Surround the cookies with mini Easter eggs, bunny-shaped candies, or other Easter-themed treats to create a fun display.
- Serve with milk or Easter punch – These cookies pair wonderfully with cold milk or a refreshing Easter punch for a delightful treat.
Creative Twists for Easter Chick Dipped Wafer Cookies
- Chocolate-covered pretzels – Use pretzel sticks instead of wafer cookies for a salty-sweet version of these festive treats.
- Rainbow chicks – For a colorful twist, dip the cookies in different colored chocolate coatings for a rainbow of Easter chicks.
- Coconut flakes – After dipping the cookies in yellow chocolate, roll them in sweetened shredded coconut to add texture and a tropical flavor.
- Mini chick cookies – Instead of using whole wafer cookies, break the wafers into smaller pieces and create mini chick cookies for individual servings.
Pro Tip for Customization
For a more personalized touch, you can customize your Easter Chick Dipped Wafer Cookies by incorporating different flavors of wafer cookies, such as chocolate, strawberry, or lemon, to create a variety of chick-themed treats. You can also experiment with different decorations, like using candy flowers for eyes or even adding small edible bow ties or hats for the chicks!
FAQs
Can I use store-bought chocolate instead of melting chocolate?
Yes, you can use pre-melted chocolate or candy melts, which are available in a variety of colors, to coat your cookies. Simply heat the chocolate and follow the same dipping process.
How long do “Easter Chick Dipped Wafer Cookies” last?
When stored in an airtight container at room temperature, Easter Chick Dipped Wafer Cookies can last up to 1 week. You can also refrigerate them for up to 2 weeks if you want to extend their freshness.
Can I make “Easter Chick Dipped Wafer Cookies” ahead of time?
Yes, these cookies can be made ahead of time and stored in an airtight container for up to 1 week. They are a great make-ahead treat for Easter celebrations.
Can I freeze these cookies?
While you can freeze the cookies, the texture of the wafer may slightly change after thawing. If you want to freeze them, store them in an airtight container with parchment paper between layers of cookies to prevent sticking.
Can I use other colors for the chicks?
Absolutely! You can use any color of candy melts or food coloring to create different colored chicks. Try pastel pink, blue, or lavender for a spring-themed variation.
Conclusion
Easter Chick Dipped Wafer Cookies are a fun, festive, and easy-to-make treat that will add a cheerful touch to your Easter celebrations. With their crispy wafer texture, creamy chocolate coating, and adorable chick design, they’re sure to be a hit with both kids and adults alike. Whether you stick to the classic yellow chick or get creative with different flavors and decorations, these cookies are a delightful way to celebrate Easter. So, gather your ingredients, follow the steps, and enjoy this fun and tasty treat with your loved ones!
If you like it, Leave a Comment !
There are no reviews yet. Be the first one to write one.