How To Make Whipped Kool Aid, Easy Steps
Whipped Kool Aid
Table of Contents

Whipped Kool Aid is a fun and colorful twist on the whipped drink trend that exploded on social media. Inspired by whipped coffee and other frothy beverages, whipped Kool Aid delivers a sweet, creamy treat packed with nostalgic flavor and vibrant color. Perfect for summer parties, kids’ snacks, or just when you need a sweet pick-me-up, this simple recipe is easy to make with a few basic ingredients. Once you learn how to make whipped Kool Aid, it will become one of your favorite go-to drinks for any occasion.
In this article, you’ll learn how to make Whipped Kool Aid with step-by-step instructions, key ingredient roles, tips for presentation, and creative ways to customize it for your own style.
Key Ingredients and Their Roles
Kool Aid Powder
Kool Aid is the heart of the recipe. It brings bold color and fruity flavor. You can use any flavor you like—cherry, blue raspberry, grape, or tropical punch are great options. Choose a flavor that fits your mood or event theme.
Heavy Whipping Cream
This ingredient creates the whipped texture. When whipped, the cream becomes thick, fluffy, and creamy. It balances the sweetness of the Kool Aid and gives the drink a milkshake-like consistency.
Sugar or Sweetener
Kool Aid powder is unsweetened, so you need sugar to make it sweet and tasty. You can adjust the amount based on your preference.
Milk (Optional)
Milk is not always necessary, but it can be added as a base layer to serve under the whipped topping, making the drink more filling and smooth.
Ice (Optional)
You can add ice to your glass before pouring in the milk and topping it with the whipped Kool Aid. It keeps the drink chilled and refreshing.
Preparation Time
- Prep Time: 5 minutes
- Whipping Time: 3-5 minutes
- Total Time: 8-10 minutes
- Servings: 2
Ingredients
- 1 packet Kool Aid powder (any flavor)
- 1/2 cup heavy whipping cream
- 2 tablespoons sugar (adjust to taste)
- 1 cup milk (optional, for layering)
- Ice cubes (optional)
- Sprinkles, fruit slices, or whipped cream for garnish (optional)
Step-by-Step Cooking Instructions with Expert Tips
Step 1: Prepare the Whipped Base
In a medium-sized mixing bowl, add heavy whipping cream, sugar, and the Kool Aid powder.
Expert Tip: For best results, use chilled heavy cream and a cold mixing bowl. Cold tools help the cream whip faster.
Step 2: Whip Until Fluffy
Use a hand mixer or stand mixer on medium-high speed to whip the mixture. Beat until soft peaks form. This means the cream holds its shape but is still smooth and light.
Expert Tip: Don’t overmix. Over-whipping can turn the cream into butter.
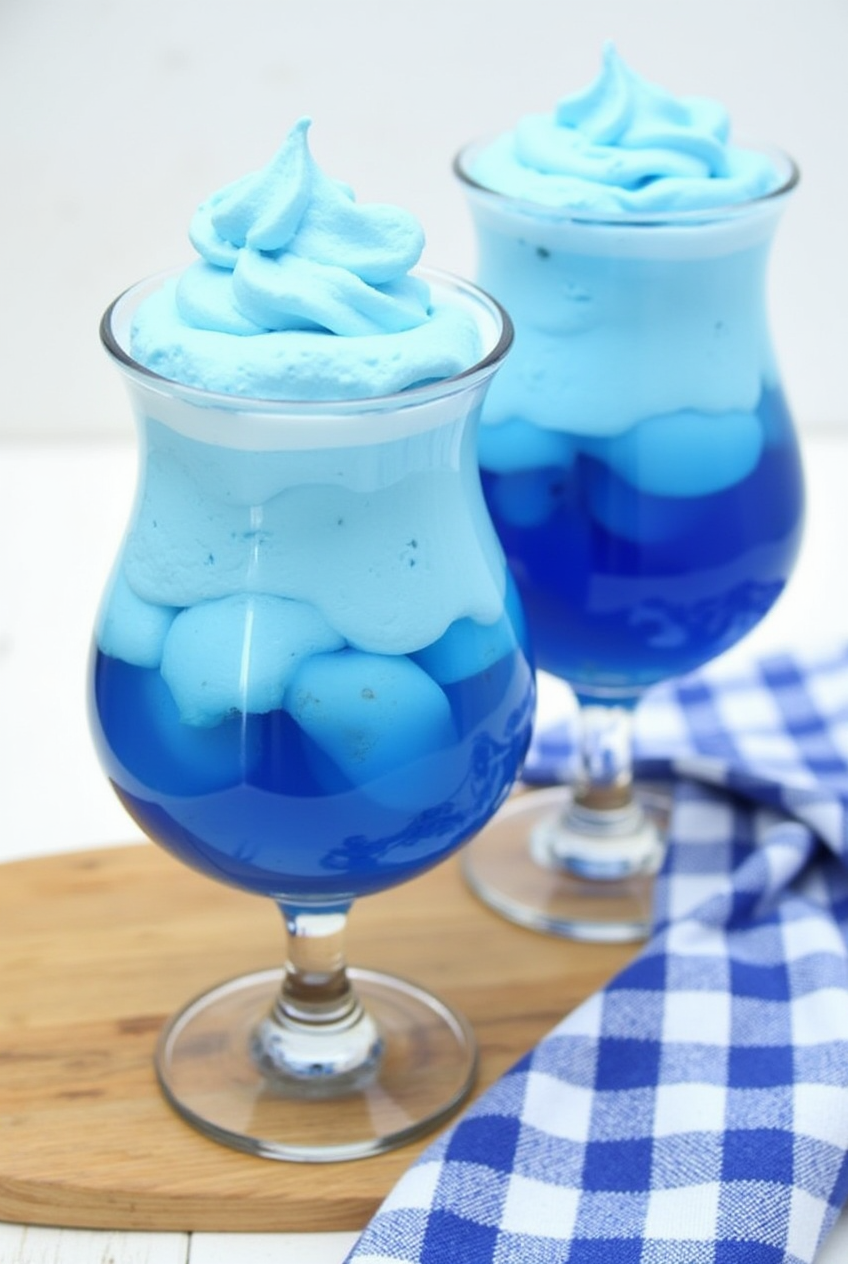
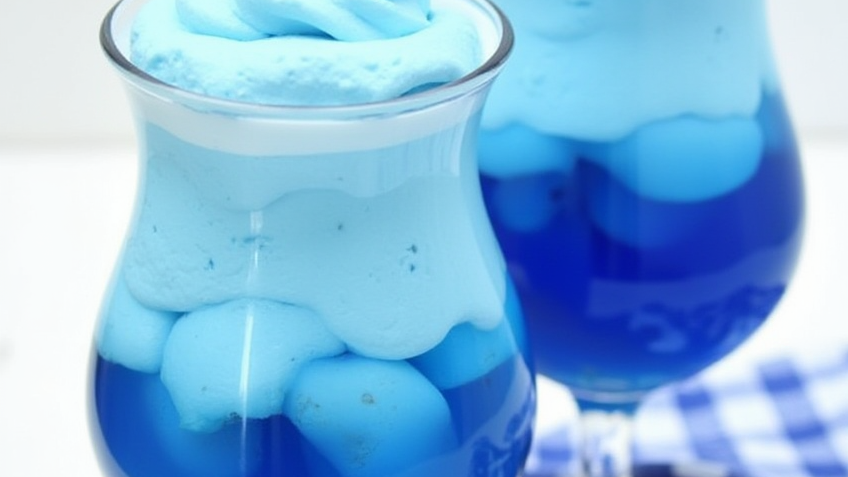
Step 3: Build the Drink
In a tall glass, add a few ice cubes and pour in milk until the glass is about two-thirds full. Then, spoon the whipped Kool Aid mixture on top.
Expert Tip: You can skip the milk and ice if you prefer a thicker dessert-style treat. Simply serve the whipped Kool Aid in small dessert glasses like a mousse.
Step 4: Garnish and Serve
Top the whipped Kool Aid with whipped cream, colorful sprinkles, or even fresh fruit slices for extra flavor and style. Serve immediately with a spoon or straw.
Expert Tip: Serve with a wide straw or drink spoon to enjoy both the milk and the whipped topping.
Presentation Tips
- Use clear glasses to show off the colorful layers.
- Add a sugar rim by dipping the glass edge in water and then in colored sugar.
- Use matching straws or spoons for each Kool Aid flavor.
- Serve in mini mason jars or dessert cups for parties.
- Layer with contrasting colors (like milk and red Kool Aid) for a bold look.
Creative Twists
Kool Aid Cream Slush
Blend the milk with ice before adding the whipped topping for a thick slush base.
Frozen Whipped Kool Aid
Freeze the whipped mixture in silicone molds or an ice cube tray, then serve in chilled milk.
Rainbow Whipped Kool Aid
Make multiple batches using different Kool Aid flavors and layer them in a glass.
Whipped Kool Aid Parfait
Layer with whipped Kool Aid, fruit, and crushed cookies in a glass for a fun, colorful dessert.
Kool Aid Float
Pour lemon-lime soda or a fruity soda in the glass and top with the whipped Kool Aid for a fizzy float.
Pro Tip for Customization
Whipped Kool Aid is one of the easiest drinks to personalize. Here’s how to make it your own:
- Use flavored coffee creamer instead of milk for a unique taste.
- Swap the sugar with a sugar substitute for a lower-calorie option.
- Try different flavor combinations by mixing Kool Aid packets.
- Make it dairy-free with coconut cream and plant-based milk.
FAQs
Can I use any flavor of Kool Aid for this recipe?
Yes! Any Kool Aid flavor works. Pick your favorite or mix two for a new twist.
Do I need a mixer to make whipped Kool Aid?
A hand or stand mixer is best, but you can use a whisk. It just takes longer and more effort.
Can I make this ahead of time?
The whipped mixture is best used fresh. If you make it ahead, store it in the fridge and re-whip before serving.
Can I make this without sugar?
Yes, but Kool Aid powder is unsweetened, so you’ll need a sugar substitute or sweetened creamer.
Is whipped Kool Aid kid-friendly?
Absolutely! It’s fun, colorful, and sweet—perfect for kids’ parties or summer treats.
Can I freeze whipped Kool Aid?
Yes. Freeze it in small molds for bite-sized frozen treats or blend it with milk for a frozen drink.
Is it possible to make a vegan version?
Yes. Use coconut cream instead of heavy cream and almond, soy, or oat milk as a base.
Whipped Kool Aid is a creative, colorful, and easy-to-make treat that adds a playful twist to any drink menu. Whether you serve it as a refreshing beverage or a fluffy dessert, this recipe is sure to delight both kids and adults with its nostalgic flavors and customizable flair.
If you like it, Leave a Comment !
There are no reviews yet. Be the first one to write one.