Chocolate Easter Egg Nest Cake, The Best Easter Dessert
Chocolate Easter Egg Nest Cake: A Delicious Easter Dessert
Table of Contents

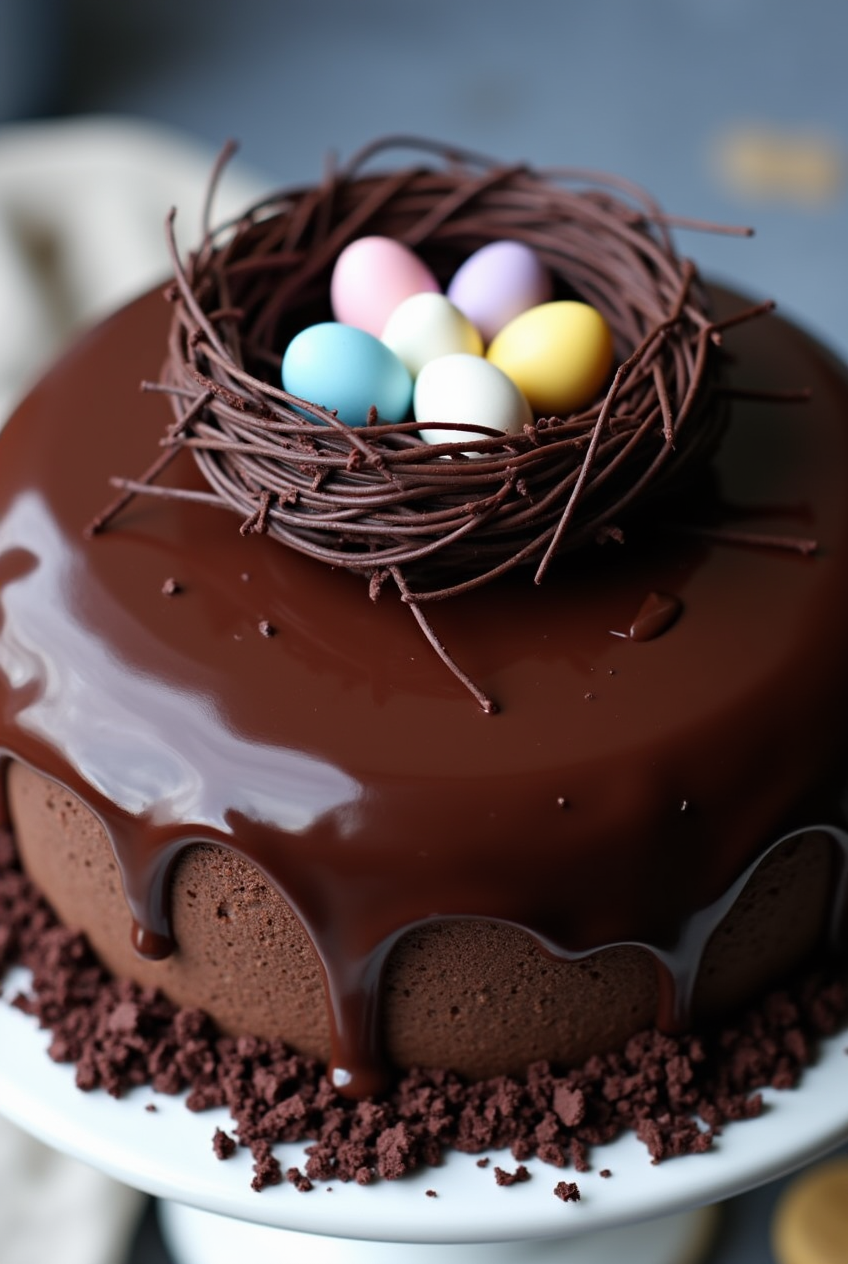
Easter is a time for family gatherings, springtime celebrations, and of course, indulgent desserts. One of the most fun and festive treats to serve during this season is the Chocolate Easter Egg Nest Cake. This decadent dessert not only looks stunning but also combines rich chocolate flavors with a playful Easter twist. Whether you’re hosting an Easter brunch, dinner, or a family-friendly dessert table, this cake will steal the show and bring joy to everyone.
In this article, we will take you through the details of making a Chocolate Easter Egg Nest Cake, including the key ingredients and their roles, preparation time, the ingredients needed, step-by-step cooking instructions, expert tips, presentation ideas, creative twists, pro tips for customization, and answers to some frequently asked questions. This easy-to-follow guide is optimized for SEO, and we’ve used simple language to ensure that you can make this delightful Easter dessert with ease!
Key Ingredients and Their Roles
The Chocolate Easter Egg Nest Cake combines a variety of ingredients that work together to deliver a delightful dessert with both texture and flavor. Here’s a breakdown of the key ingredients and their roles in creating this cake.
For the Cake:
- All-purpose flour: The main dry ingredient that provides structure to the cake.
- Cocoa powder: Adds a rich chocolate flavor to the cake, giving it a deep, velvety taste.
- Baking powder: Helps the cake rise and ensures it’s light and fluffy.
- Eggs: Provide structure and stability to the cake while adding moisture.
- Granulated sugar: Sweetens the cake and balances the cocoa powder’s bitterness.
- Milk: Adds moisture to the batter, ensuring the cake is soft and tender.
- Butter: Adds richness and flavor to the cake.
- Vanilla extract: Enhances the flavor and complements the chocolate taste.
For the Chocolate Nest:
- Chocolate chips (dark or milk): The base for making the chocolate nest. Dark chocolate provides a deeper flavor, while milk chocolate adds creaminess.
- Rice cereal (like Rice Krispies): Creates the texture for the nest, making it crispy and light.
- Butter: Used to melt the chocolate and help coat the rice cereal, allowing it to stick together to form the nest.
- Mini chocolate eggs: These will be the “eggs” inside the nest, adding an Easter touch and a delicious bite-sized treat.
For Decoration (Optional):
- Sprinkles: Adds some color and extra fun to the cake.
- Powdered sugar: A light dusting of powdered sugar can give the cake an elegant and finished look.
- Fresh flowers: For a spring-inspired touch, fresh edible flowers can be used to enhance the cake’s presentation.
Preparation Time:
- Prep time: 25 minutes
- Cook time: 30 minutes
- Cooling time: 1 hour
- Total time: 1 hour 55 minutes
Ingredients
For the Cake:
- 1 ½ cups all-purpose flour
- ½ cup unsweetened cocoa powder
- 1 ½ teaspoons baking powder
- 2 large eggs
- 1 cup granulated sugar
- ½ cup butter, softened
- 1 cup milk
- 1 teaspoon vanilla extract
For the Chocolate Nest:
- 2 cups chocolate chips (dark or milk)
- 3 cups Rice Krispies or crispy rice cereal
- 2 tablespoons butter
- 12-15 mini chocolate eggs (or candy eggs)
For Decoration (Optional):
- Sprinkles
- Powdered sugar
- Fresh edible flowers
Step-by-Step Cooking Instructions
Step 1: Make the Cake
- Preheat the oven to 350°F (175°C) and grease and flour two 8-inch round cake pans.
- Mix the dry ingredients – In a bowl, sift together the flour, cocoa powder, and baking powder.
- Cream the butter and sugar – In a separate large bowl, beat the softened butter and granulated sugar together until light and fluffy.
- Add the eggs – Beat in the eggs one at a time, ensuring each is well incorporated before adding the next.
- Add the dry ingredients – Gradually add the sifted dry ingredients to the butter mixture, alternating with the milk. Start and end with the dry ingredients.
- Add the vanilla – Stir in the vanilla extract until the batter is smooth and well combined.
- Pour and bake – Divide the batter evenly between the prepared cake pans. Bake for 25-30 minutes or until a toothpick inserted into the center comes out clean.
- Cool – Let the cakes cool in the pans for 10 minutes before transferring them to wire racks to cool completely.
Step 2: Prepare the Chocolate Nest
- Melt the chocolate – In a medium saucepan, melt the butter over medium heat. Once melted, add the chocolate chips and stir until smooth and fully melted.
- Mix in the Rice Krispies – Remove the saucepan from the heat and stir in the Rice Krispies cereal, coating it evenly with the melted chocolate.
- Form the nest – Spoon the chocolate-coated cereal into a large bowl or a plate, forming a nest-like shape. You can use a bowl to form a round nest or shape it by hand into a more organic nest. Let it set for 10 minutes.
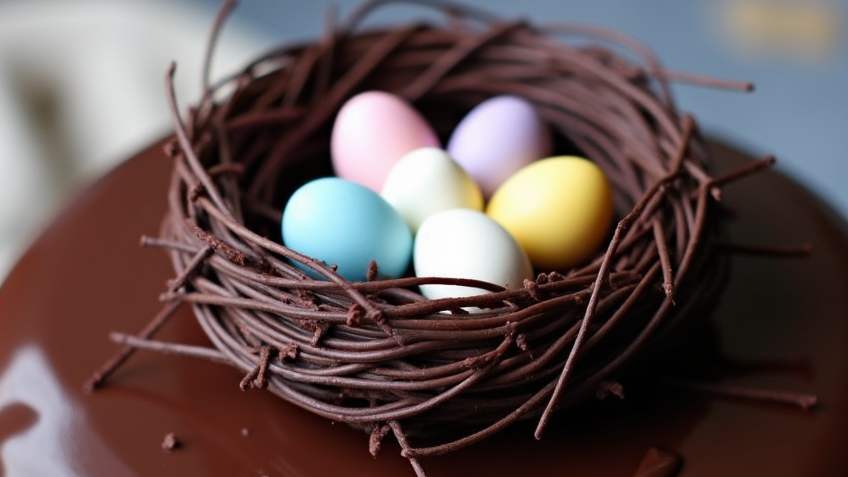
- Place the eggs – Gently place the mini chocolate eggs on top of the nest to create the “Easter egg” effect.
Step 3: Assemble the Cake
- Layer the cakes – Once the cake layers have cooled completely, place the first cake layer on a serving platter. Add a generous amount of frosting or whipped cream if you’d like.
- Top with the second layer – Place the second layer of cake on top of the first.
- Add the nest – Gently place the chocolate Easter egg nest on top of the cake, ensuring that it rests securely.
Step 4: Decorate and Serve
- Sprinkle with powdered sugar – Lightly dust the top of the cake with powdered sugar for an elegant touch.
- Add sprinkles and flowers – For an extra burst of color, add sprinkles or edible flowers on the cake for a fun and festive touch.
- Serve – Cut into slices and serve the delicious Chocolate Easter Egg Nest Cake to your guests. Enjoy!
Expert Tips for the Best Chocolate Easter Egg Nest Cake
- Use high-quality chocolate – For the best flavor, choose high-quality chocolate chips or even chopped chocolate bars.
- Don’t overmix the batter – Mix the cake ingredients just until combined to avoid a dense texture.
- Allow the cake to cool completely – Ensure the cake is completely cooled before assembling, as this prevents the frosting or decorations from melting.
- Use room temperature ingredients – Make sure the butter, eggs, and milk are at room temperature to create a smooth batter.
- Make ahead – You can make the cake layers in advance and store them at room temperature or freeze them for up to 3 days.
Presentation Tips
- Use colorful sprinkles – Add pastel-colored sprinkles to enhance the Easter theme and make the cake pop visually.
- Serve on a festive platter – Choose a spring-themed or pastel-colored cake stand to display the cake beautifully.
- Top with a few extra eggs – Place a few chocolate eggs around the base of the cake for a more dramatic effect.
- Pair with a fresh fruit salad – Serve the cake with a side of fresh fruit, such as strawberries or blueberries, to balance the richness of the cake.
Creative Twists for the Chocolate Easter Egg Nest Cake
- Make it a layered cake – Add a layer of frosting or chocolate ganache between the cake layers for added richness.
- Use different types of chocolate – Experiment with white chocolate, milk chocolate, or dark chocolate for the nest and cake.
- Add Easter-themed decorations – Use marshmallow peeps, candy flowers, or other Easter candy to decorate the top of the cake for an extra festive look.
Pro Tip for Customization
If you want to customize your Chocolate Easter Egg Nest Cake, consider changing up the flavor profile. You could swap out the cocoa powder for instant coffee or espresso powder to give it a mocha flavor. Or, replace the chocolate cake with a vanilla or carrot cake for a different twist. Additionally, feel free to use any type of candy or egg you prefer, like jelly beans or caramel eggs.
FAQ’s
Can I make the Chocolate Easter Egg Nest Cake ahead of time?
Yes! You can make the cake layers and chocolate nest ahead of time and store them in an airtight container. Just assemble the cake and add the decorations before serving.
Can I use a store-bought cake mix for this recipe?
Yes, if you’re short on time, you can easily substitute the homemade cake with a store-bought chocolate cake mix. Just follow the package instructions for baking.
Can I freeze the Chocolate Easter Egg Nest Cake?
Yes, you can freeze the cake layers. Wrap them tightly in plastic wrap and foil, and they can be stored in the freezer for up to 2 months. Let them thaw in the fridge overnight before assembling.
How can I make Chocolate Easter Egg Nest Cake gluten-free?
To make this cake gluten-free, substitute the all-purpose flour with a gluten-free flour blend and ensure your chocolate chips and other ingredients are certified gluten-free.
Can I use a different cereal for the nest?
Yes, if you prefer, you can use corn flakes, crushed graham crackers, or even shredded coconut for the nest base.
Conclusion
The Chocolate Easter Egg Nest Cake is a delicious, fun, and festive Easter dessert that’s sure to be a hit with your family and friends. With its rich chocolate flavor, crispy nest, and colorful Easter eggs, this cake is the
perfect way to celebrate the season. Whether you stick to the classic recipe or get creative with twists, this Easter treat is sure to leave everyone asking for seconds!
If you like it, Leave a Comment !
There are no reviews yet. Be the first one to write one.