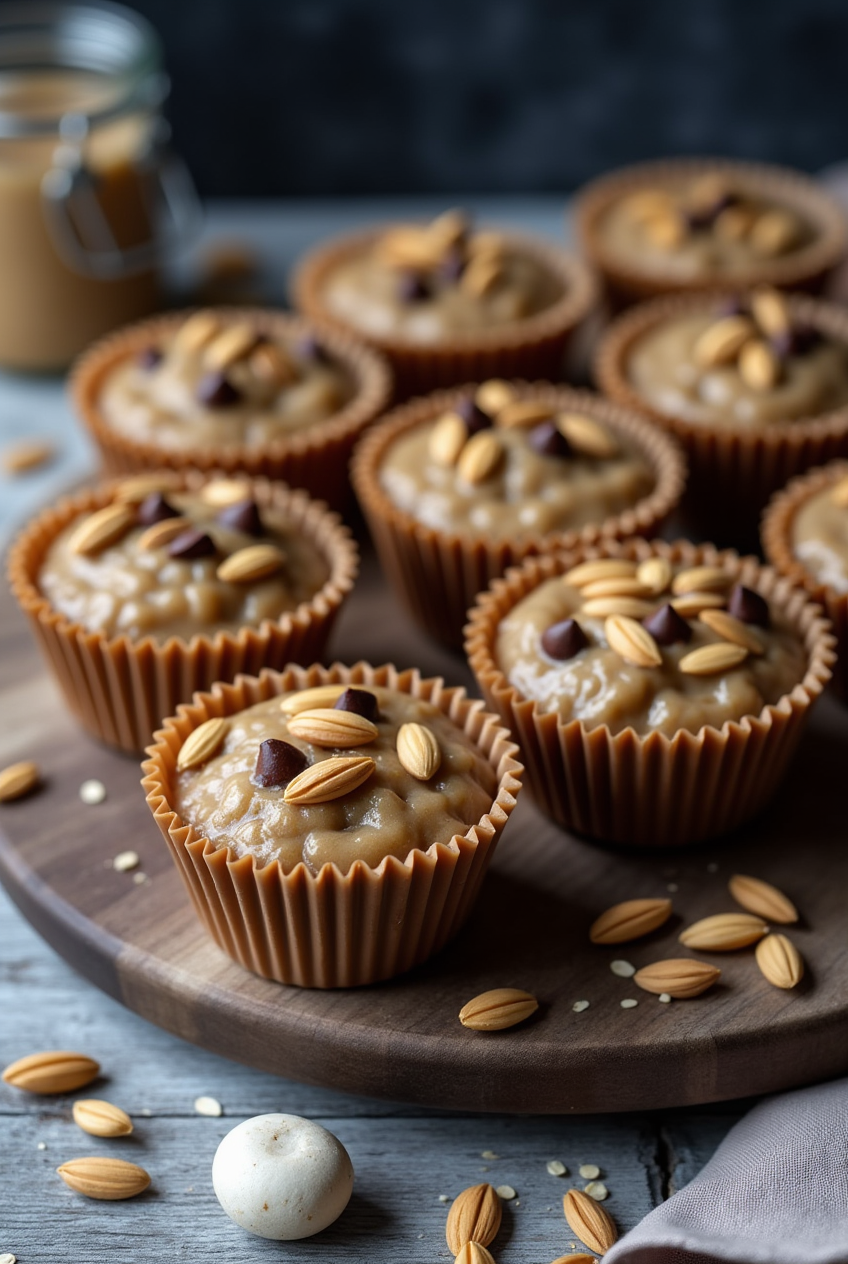
No-Bake Peanut Butter Oat Cups, A Delicious and Easy Snack
No-Bake Peanut Butter Oat Cups
Table of Contents
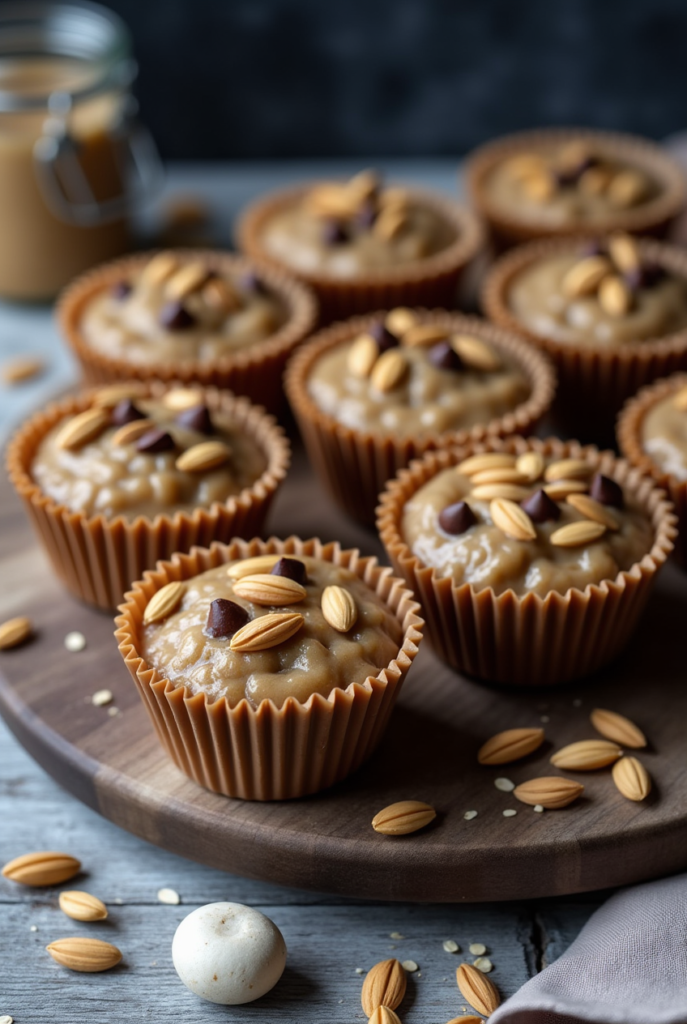
If you’re craving a sweet treat that’s both satisfying and easy to make, No-Bake Peanut Butter Oat Cups are the perfect snack recipe for you. These little cups are packed with the rich, creamy flavor of peanut butter and the wholesome goodness of oats. Plus, they come together quickly, with no baking required!
In this article, we’ll guide you through everything you need to know about making No-Bake Peanut Butter Oat Cups, including key ingredients and their roles, preparation time, step-by-step cooking instructions, expert tips, presentation tips, creative twists, pro customization tips, and frequently asked questions. This simple and tasty treat is sure to become a staple in your snack repertoire.
Key Ingredients and Their Roles
Each ingredient in No-Bake Peanut Butter Oat Cups plays a crucial role in creating a delicious and balanced treat. Here’s a breakdown of what you’ll need and why each ingredient is important:
Main Ingredients:
- Peanut Butter – The star of the recipe, peanut butter adds a rich, creamy flavor and helps bind the ingredients together. It also provides a good dose of healthy fats and protein.
- Oats – Rolled oats are the base of this recipe. They give the cups a chewy texture and provide fiber and essential nutrients.
- Honey – A natural sweetener, honey not only adds sweetness but also helps bind the ingredients together for a smoother consistency.
- Ground Flaxseed (Optional) – Flaxseed is a great source of omega-3 fatty acids and fiber. It’s optional but adds a nutritional boost.
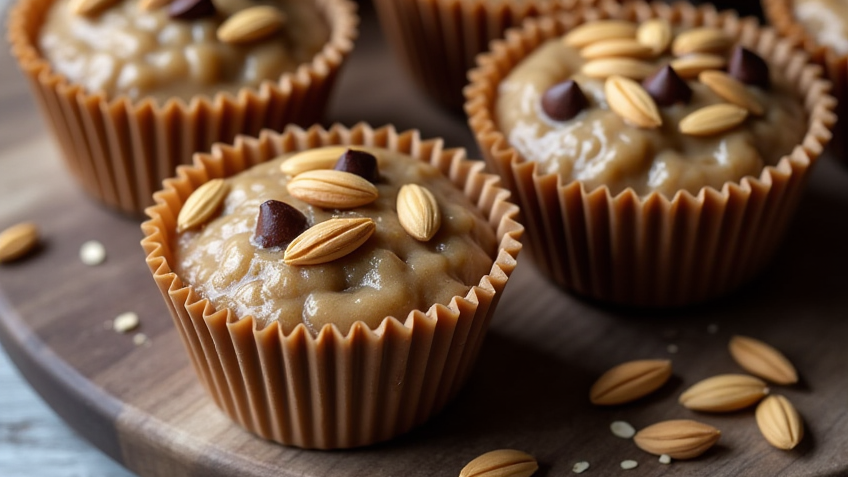
- Chocolate Chips (Optional) – For an extra indulgence, chocolate chips can be mixed into the batter or sprinkled on top for some extra sweetness and texture.
For the Topping (Optional):
- Chopped Nuts – Chopped peanuts or other nuts like almonds or cashews can add a crunchy texture and extra flavor.
- Shredded Coconut – For a tropical twist, you can top the cups with shredded coconut.
Preparation Time
- Prep Time: 10 minutes
- Chill Time: 1-2 hours
- Total Time: 1 hour 10 minutes (or longer if you choose to let the cups chill for a longer period)
Ingredients
For the No-Bake Peanut Butter Oat Cups:
- 1 cup peanut butter (smooth or crunchy)
- 1/4 cup honey
- 1 1/2 cups rolled oats
- 1/4 cup ground flaxseed (optional)
- 1/2 teaspoon vanilla extract
- 1/4 cup chocolate chips (optional)
For the Topping (Optional):
- 1/4 cup chopped peanuts, almonds, or cashews
- 1/4 cup shredded coconut
Step-by-Step Cooking Instructions
Making No-Bake Peanut Butter Oat Cups is incredibly easy and requires just a few simple steps. Let’s walk through the process:
Step 1: Prepare the Ingredients
- Gather all your ingredients: Measure out the peanut butter, honey, oats, flaxseed (if using), vanilla extract, and any optional toppings or mix-ins.
- Melt the peanut butter and honey: In a microwave-safe bowl, heat the peanut butter and honey together in the microwave for about 20-30 seconds, or until the peanut butter is soft and can be easily mixed with the honey. Stir to combine.
Step 2: Mix the Ingredients
- Add the dry ingredients: To the peanut butter and honey mixture, add the oats, flaxseed (if using), and vanilla extract. Stir everything together until the mixture is well combined. If you’re using chocolate chips, fold them in now.
Step 3: Form the Cups
- Prepare the muffin tin: Line a muffin tin with paper liners or lightly grease it to prevent sticking. If you don’t have a muffin tin, you can also form individual cups on a parchment-lined baking sheet.
- Scoop the mixture into the muffin tin: Using a spoon or cookie scoop, evenly distribute the mixture into each muffin cup, pressing it down lightly to form compact cups.
- Optional topping: If you want to add a topping, sprinkle the chopped nuts or shredded coconut over the cups at this point. You can also press additional chocolate chips into the top.
Step 4: Chill the Cups
- Chill to set: Place the muffin tin or parchment-lined baking sheet in the refrigerator for about 1-2 hours, or until the cups are firm and set.
- Serve: Once the cups are firm, they’re ready to serve! Remove them from the muffin tin or peel off the liners and enjoy.
Expert Tips for the Best No-Bake Peanut Butter Oat Cups
- Use natural peanut butter: Natural peanut butter with no added sugar or hydrogenated oils will give the cups a more authentic peanut butter flavor. If using regular peanut butter, be sure to stir it well before mixing.
- Don’t skip the chilling step: Chilling the cups allows them to firm up and makes them easier to eat. If you’re in a rush, you can speed up the chilling process by placing the cups in the freezer for about 30 minutes.
- Adjust sweetness to your liking: If you prefer a sweeter treat, add a little more honey or maple syrup. Taste the mixture before chilling and adjust the sweetness as needed.
- Use a mini muffin tin: For smaller, bite-sized portions, use a mini muffin tin. These smaller cups are perfect for snacks or party trays.
Presentation Tips
- Garnish with fresh fruit: If you want to make the No-Bake Peanut Butter Oat Cups look extra special, add a few slices of banana, berries, or even a drizzle of caramel sauce on top.
- Serve in a cute tray or bowl: Arrange the cups in a decorative tray or bowl for a more appealing presentation.
- Top with a dollop of whipped cream: For a creamy touch, top each cup with a small dollop of whipped cream and a sprinkle of cocoa powder or cinnamon.
Creative Twists
- Add protein powder: For a protein-packed snack, add a scoop of your favorite protein powder to the mixture. This is a great way to turn these cups into a post-workout treat.
- Make them with almond or cashew butter: If you prefer other nut butters, you can easily swap peanut butter for almond butter or cashew butter. Each nut butter will give the cups a slightly different flavor.
- Add dried fruit: Mix in dried cranberries, raisins, or apricots for a fruity twist and extra sweetness.
- Drizzle with chocolate: For a more indulgent treat, melt some chocolate and drizzle it over the top of each cup after they have chilled. You can use dark, milk, or white chocolate based on your preference.
- Add chia seeds: For an extra boost of fiber and omega-3 fatty acids, mix in a tablespoon of chia seeds. They’ll add a little crunch and help thicken the mixture.
Pro Tip for Customization
To make No-Bake Peanut Butter Oat Cups even more customizable, consider making different versions based on your taste preferences. For example, you can create a chocolate peanut butter version by adding cocoa powder to the mixture. Or, try adding a dash of cinnamon or vanilla extract to complement the peanut butter flavor.
If you prefer a lower-sugar option, you can substitute the honey with maple syrup, or opt for a sugar-free sweetener like stevia or monk fruit. You can also replace the oats with gluten-free oats for a gluten-free option.
FAQs
Can I make No-Bake Peanut Butter Oat Cups ahead of time?
Yes! You can make them in advance and store them in the refrigerator for up to a week. They’ll keep fresh as long as they’re stored in an airtight container.
How long do No-Bake Peanut Butter Oat Cups need to chill?
It’s best to chill them for about 1-2 hours to ensure they are firm and set properly. If you’re in a hurry, you can place them in the freezer for about 30 minutes.
Can I freeze No-Bake Peanut Butter Oat Cups?
Yes! These cups freeze well. Just place them in an airtight container and store them in the freezer for up to 2 months. To serve, let them thaw in the fridge for a few hours or at room temperature for about 30 minutes.
Can I use a different nut butter?
Absolutely! You can swap out the peanut butter for almond butter, cashew butter, or even sunflower seed butter if you have a peanut allergy. Each nut butter will add its own unique flavor to the cups.
Can I add protein powder to these cups?
Yes! You can easily add a scoop of protein powder to the mixture. Just be sure to adjust the amount of liquid (honey or maple syrup) if needed to maintain the right texture.
Conclusion
No-Bake Peanut Butter Oat Cups are the perfect combination of sweetness, creaminess, and crunch. They’re easy to make, customizable, and perfect for satisfying your cravings with a healthier, more wholesome option. Whether you enjoy them as a snack, a dessert, or a post-workout treat, these cups are sure to become a staple in your kitchen. Try making them today, and enjoy a delicious bite-sized snack that’s as nutritious as it is tasty!
If you like it, Leave a Comment !
There are no reviews yet. Be the first one to write one.